

To assemble boxed (flat-pack) furniture without mistakes, start by reading the entire instruction manual, taking a complete inventory of all parts and hardware, and laying down the shipping cardboard to protect your floors. Assemble the frame in the room where it will stay, leave screws at 75% tightness until the entire structure is aligned, and verify the frame is square before nailing on the back panel.
Opening a flat-pack box from IKEA, Wayfair, or Target and seeing dozens of wooden boards and unlabeled bags of screws can feel overwhelming. Most assembly mistakes—like stripped screws, backward panels, or wobbly frames—happen because people rush the preparation phase.
Whether you are building a TV console, a six-drawer dresser, or a bookshelf by yourself, following a systematic workflow eliminates guesswork. Below is the exact step-by-step process used by professional furniture assemblers to build sturdy, wobble-free furniture in half the time.
Quick Reference: Essential Tools & Hardware Guide
Before opening the hardware bags, gather the right tools. Relying solely on the tiny, L-shaped hex key included in the box will slow you down and strain your hands.
| Tool / Material | Why You Need It | Pro Usage Tip |
| Manual Screwdriver Set | Needed for 90% of cam screws and standard fasteners. | Keep both a #2 Phillips and a #2 Pozidriv head handy (IKEA uses Pozidriv). |
| Cordless Drill (Optional) | Speeds up driving long wood screws. | Set the clutch/torque to 3 or 4—high torque will split particle board instantly. |
| Rubber Mallet | Secures wooden dowels and back panels without denting wood. | If you only have a metal hammer, place a folded towel over the wood before tapping. |
| Wood Glue (PVA) | Permanently strengthens dowel joints. | Apply a tiny drop inside dowel holes—never use it on cam locks or screws. |
| Tape Measure | Ensures the frame is perfectly square before nailing the back. | Measure both diagonals; if the numbers match, your frame is at a true 90-degree angle. |
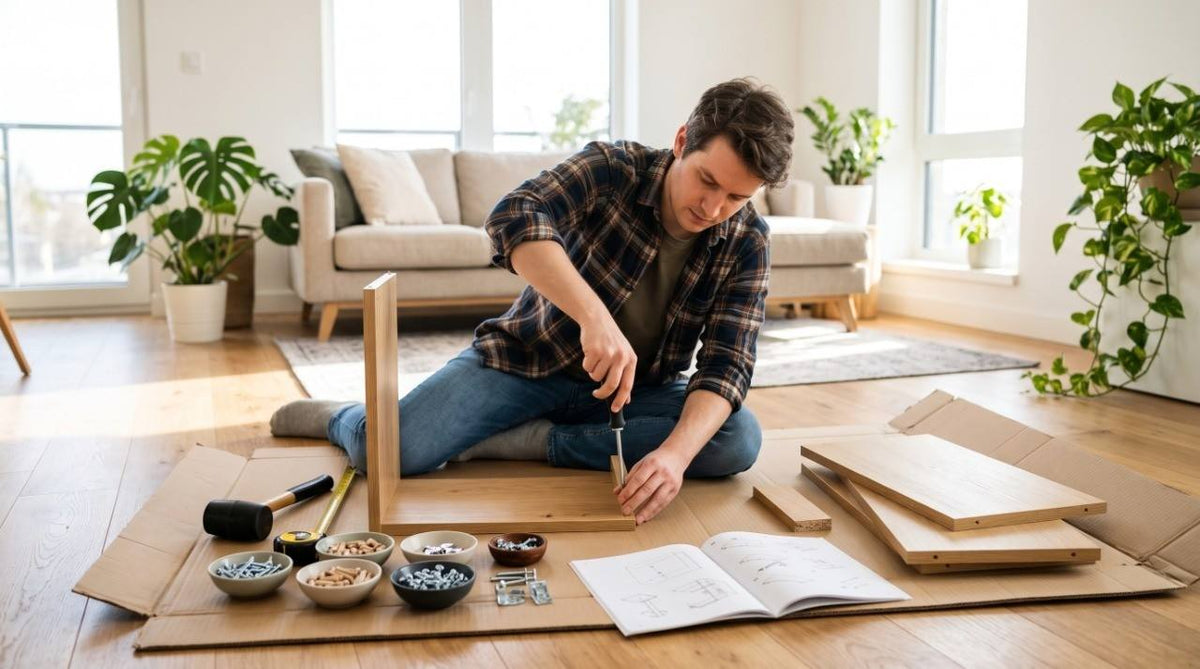
| Small Bowls or Muffin Tin | Keeps screws, cam locks, and washers sorted. | Prevents small hardware from rolling under rugs or getting lost. |
10 Steps to Foolproof Furniture Assembly
1. Clear and Prep Your Workspace in the Target Room
Always assemble heavy furniture in the exact room where you plan to use it. Building a large wardrobe or TV stand in the living room and trying to carry it through narrow hallways often twists the joints and loosens cam locks. Clear a wide, flat floor space near the final spot so you only have to slide or lift the finished piece a few feet.
2. Use the Shipping Box as a Protective Work Mat
Never assemble furniture directly on hardwood, tile, or concrete floors—one slip of a board will scratch both your floor and the furniture’s finish. Instead of risking a good blanket or rug, flatten the cardboard box the furniture came in and lay it across your workspace. Cardboard provides a firm, scratch-free surface and catches stray wood dust or glue drips.
3. Read the Entire Manual (Including the "General" Page)
Before touching a single screw, spend five minutes flipping through the entire instruction booklet from cover to cover. Pay close attention to the first two pages of diagrams. Manuals use tiny visual cues—such as an "X" over a power drill, an arrow showing which way an unfinished edge should face, or a specific hinge adjustment diagram—that prevent the most common build errors.
4. Take a Complete Inventory of Parts and Hardware
Empty the box and organize all wooden panels in numerical or alphabetical order. Next, sort the hardware into separate bowls or compartments of a muffin tin, matching each piece against the parts list in the manual.
-
Check for defects early: Inspect major panels for shipping cracks or missing pre-drilled holes before starting.
-
Count every fastener: Verify that you have the exact quantity of screws, dowels, and cam locks listed. Identifying a missing part before you begin saves you from having to disassemble a half-built unit later.
5. Master the "Cam Lock and Dowel" Rule
Modern ready-to-assemble (RTA) furniture relies heavily on wooden dowels and metal cam locks. Understanding how they work makes the build much stronger:
-
Wooden Dowels: Place a single drop of wood glue inside the dowel hole (not on the dowel itself, which pushes glue out onto the surface) before inserting it. Wipe away any excess glue immediately with a damp cloth.
-
Cam Screws: Screw the metal cam posts straight into the pre-drilled holes until the shoulder sits flush against the board—do not over-tighten or tilt them.
-
Cam Locks: Insert the circular cam lock with its arrow pointing directly toward the incoming cam screw. Once the boards meet, turn the cam lock clockwise about a half-turn (180 degrees) until it stops firmly. Never force it past its stopping point, as pot-metal cam locks can snap.
6. Follow the Step-by-Step Sequence Strictly
Manufacturers engineer assembly steps in a specific order so you have the clearance needed to reach tight interior corners. Skipping ahead—such as attaching a top panel before installing drawer slides—often forces you to undo previous steps. Complete each step in exact numerical order, double-checking that unfinished raw edges face the back or bottom of the unit.
7. Leave Screws at 75% Tightness Until the Frame is Aligned
When attaching multiple screws to a frame, legs, or metal brackets, avoid tightening the first screw all the way down immediately. Tighten every screw in that step to about 75% capacity so the pieces stay together but still have slight wiggle room. Once all screws in that section are started and the corners align flush, go back and tighten them completely. This prevents misaligned holes and cross-threading.
8. Square the Frame Before Nailing the Back Panel
The thin fiberboard back panel is not just decorative—it provides the structural rigidity that stops a bookcase or dresser from swaying side to side. Before nailing or screwing it on:
-
Lay the unit face-down on your cardboard mat.
-
Use a tape measure to measure diagonally from the top-left corner to the bottom-right corner.
-
Measure from the top-right corner to the bottom-left corner.
-
Gently push the corners until both diagonal measurements are identical. Once the frame is square, fasten the back panel evenly around the perimeter.
9. Lift—Never Drag—When Moving the Assembled Piece
Most flat-pack furniture is built upside down or lying flat on its back. When turning it upright, avoid pivoting all the weight onto two legs, which creates lateral shear stress that can snap wooden dowels or rip screws out of particle board. If you are working alone, lift from the thickest structural frame panels rather than grabbing thin shelves or overhangs. Once upright, always lift the piece to move it rather than dragging it across the floor.
10. Install Anti-Tip Hardware and Adjust Hinges
For tall dressers, bookshelves, and media consoles, attach the included wall-anchoring strap to a wall stud immediately after positioning the unit. Finally, if your piece has cabinet doors with uneven gaps, use the three adjustment screws on the European-style concealed hinges:
-
Front screw: Moves the door left or right to even out the center gap.
-
Back screw: Moves the door closer to or further away from the cabinet frame.
-
Top/bottom mounting plate screws: Raises or lowers the entire door vertically.
Common Furniture Assembly Mistakes to Avoid
-
Using a high-speed drill on particle board: Engineered wood (MDF and particle board) strips easily. Always finish tightening screws by hand with a manual screwdriver so you can feel when the screw stops.
-
Installing drawer slides upside down: Drawer runners come in left/right pairs and cabinet/drawer pairs. Check the manual's diagram for the wheel orientation and ensure the front edge sits flush or recessed exactly as shown.
-
Hammering back-panel nails too close to the edge: Keep nails centered along the thickness of the side panels. If angled even slightly, the nail tip will poke through the finished exterior side of your furniture.
Frequently Asked Questions (FAQ)
Can I use a power drill to assemble IKEA or flat-pack furniture?
Yes, you can use a cordless power drill for driving long wood screws, provided you set the drill's clutch (torque ring) to a low setting between 3 and 5 and use slow trigger speed. Never use an impact driver, and always tighten the final quarter-turn by hand with a regular screwdriver to avoid stripping the particle board.
How do I make cheap flat-pack furniture sturdier and last longer?
To make flat-pack furniture significantly sturdier, apply a small drop of PVA wood glue inside every wooden dowel hole during assembly, replace small back-panel nails with short 5/8-inch wood screws, and ensure the frame is measured diagonally to be 100% square before fastening the back board.
What should I do if a screw strips the hole in particle board?
If a screw spins freely in a stripped particle board hole, remove the screw, dip a couple of wooden toothpicks in wood glue, and push them into the hole. Snap the toothpicks off flush with the surface, let the glue dry for 30 minutes, and re-drive the screw into the newly reinforced wood fibers.
How long does it take one person to assemble flat-pack furniture?
A single person typically takes 30 to 45 minutes to assemble a small nightstand or side table, 1.5 to 2.5 hours for a TV console or bookshelf, and 3 to 5 hours for a multi-drawer dresser or wardrobe. Laying out parts and sorting hardware beforehand usually cuts total assembly time by 25%.
Why won't my cam lock turn all the way?
A cam lock will not turn if the incoming cam screw is not inserted deep enough or is tilted at an angle, or if the cam lock's arrow was not pointing toward the screw hole before insertion. Back the boards apart, verify the cam screw is straight and flush, align the arrow with the hole, and try again.